MySQL Master Master Replication
MySQL Master-Master replication is a powerful technique for high availability and load balancing in database management. This setup ensures data redundancy and improved fault tolerance, making it suitable for applications that demand high availability and minimal downtime.
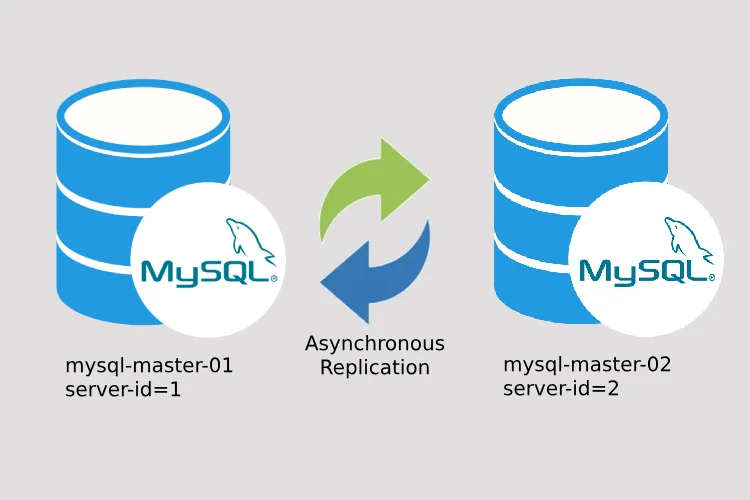
Master-Master Replication Overview
In a Master-Master replication configuration, both nodes act as both masters and slaves, allowing data to be written and read from either node. This symmetry helps distribute the database workload evenly and ensures that no single point of failure exists.
Server A Configuration (IP Address 172.17.0.2)
Setp 1: Open the MySQL configuration file, usually located at /etc/my.cnf or /etc/mysql/my.cnf, and add or modify the following settings:
1
2
3
4
5
6
7
8
9
10
[mysqld]

# replication settings
server-id = 1
log-bin = /var/lib/mysql/mysql-bin.log
binlog-do-db = test

# to avoid primary key conflicts
auto_increment_increment = 2
auto_increment_offset = 1
server-id: Set this to a unique numeric identifier for each server, such as 1 for Server A.
log-bin: Enables binary logging, which is essential for replication.
binlog-do-db: Name of the database to replicate.
auto_increment_increment: For a multi-master setup with two servers, we can set this value to 2.
auto_increment_offset: We can use different auto_increment_offset values for each server.
Setp 2: Save the configuration file and restart MySQL:
1
service mysql restart
Step 3: Login to the server and check the master status:
1
2
3
4
5
6
7
show master status;
+------------------+----------+--------------+------------------+
| File             | Position | Binlog_Do_DB | Binlog_Ignore_DB |
+------------------+----------+--------------+------------------+
| mysql-bin.000001 |      107 | test         |                  |
+------------------+----------+--------------+------------------+
1 row in set (0.00 sec)
Server B Configuration (IP Address 172.17.0.3)
Step 1: Open the MySQL configuration file, usually located at /etc/my.cnf or /etc/mysql/my.cnf, and add or modify the following settings:
1
2
3
4
5
6
7
8
9
10
[mysqld]

# replication settings
server-id = 2
log-bin = /var/lib/mysql/mysql-bin.log
binlog-do-db = test

# to avoid primary key conflicts
auto_increment_increment = 2
auto_increment_offset = 2
server-id: Set this to a unique numeric identifier for each server, such as 2 for Server B.
log-bin: Enables binary logging, which is essential for replication.
binlog-do-db: Name of the database to replicate.
auto_increment_increment: For a multi-master setup with two servers, we can set this value to 2.
auto_increment_offset: We can use different auto_increment_offset values for each server.
Step 2: Save the configuration file and restart MySQL:
1
service mysql restart
Step 3: Login to the server and check the master status:
1
2
3
4
5
6
7
show master status;
+------------------+----------+--------------+------------------+
| File             | Position | Binlog_Do_DB | Binlog_Ignore_DB |
+------------------+----------+--------------+------------------+
| mysql-bin.000001 |      107 | test         |                  |
+------------------+----------+--------------+------------------+
1 row in set (0.00 sec)
Setting Up Replication on Server A (IP Address 172.17.0.2)
Step 1: Create a MySQL user for replication:
1
2
3
4
5
6
7
create user 'replicator'@'%' identified by 'password';

grant replication slave on *.* to 'replicator'@'%';

CHANGE MASTER TO MASTER_HOST = '172.17.0.3', MASTER_USER = 'replicator', MASTER_PASSWORD = 'password', MASTER_LOG_FILE = 'mysql-bin.000001', MASTER_LOG_POS = 107;

flush privileges;
Step 2: Start the Slave: You should see “Slave_IO_Running” and “Slave_SQL_Running” as “Yes” if the replication is working correctly.
1
2
3
4
5
6
7
8
9
10
11
12
13
14
15
16
start slave;
show slave status \G;
*************************** 1. row ***************************
               Slave_IO_State: Waiting for master to send event
                  Master_Host: 172.17.0.3
                  Master_User: replicator
                  Master_Port: 3306
                Connect_Retry: 60
              Master_Log_File: mysql-bin.000001
          Read_Master_Log_Pos: 107
               Relay_Log_File: relay-bin.000001
                Relay_Log_Pos: 266
        Relay_Master_Log_File: mysql-bin.000001
             Slave_IO_Running: Yes
            Slave_SQL_Running: Yes
            ...
Setting Up Replication on Server B (IP Address 172.17.0.3)
Step 1: Create a MySQL user for replication:
1
2
3
4
5
6
7
create user 'replicator'@'%' identified by 'password';

grant replication slave on *.* to 'replicator'@'%';

CHANGE MASTER TO MASTER_HOST = '172.17.0.2', MASTER_USER = 'replicator', MASTER_PASSWORD = 'password', MASTER_LOG_FILE = 'mysql-bin.000001', MASTER_LOG_POS = 107;

flush privileges;
Step 2: Start the Slave: You should see “Slave_IO_Running” and “Slave_SQL_Running” as “Yes” if the replication is working correctly.
1
2
3
4
5
6
7
8
9
10
11
12
13
14
15
16
start slave;
show slave status \G;
*************************** 1. row ***************************
               Slave_IO_State: Waiting for master to send event
                  Master_Host: 172.17.0.2
                  Master_User: replicator
                  Master_Port: 3306
                Connect_Retry: 60
              Master_Log_File: mysql-bin.000001
          Read_Master_Log_Pos: 107
               Relay_Log_File: relay-bin.000001
                Relay_Log_Pos: 266
        Relay_Master_Log_File: mysql-bin.000001
             Slave_IO_Running: Yes
            Slave_SQL_Running: Yes
            ...
With the above settings we can setup a 2 node MySQL Master-Master Replication setup for availability and performance.
The configuration has been tested for MySQL 5.5 please use it wisely for later versions.